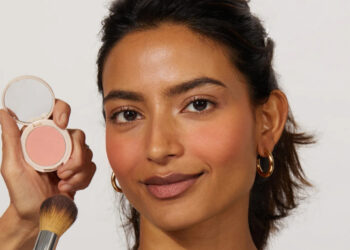
Contouring is no joke. If you’re a makeup enthusiast, you know how you contour your face can make or break a look.
When done correctly, the contour can elevate your beauty, bring out your best features, and make you glow.
However, it can be quite a disaster if done wrong. And nobody wants that.
So, to help you avoid making a mess and ruining all of your hard work, here is a fabulous guide on contouring like a pro.
Get your contour palate (or stick or any type of product you use) and brushes ready. It’s time to practice!
How To Contour Your Face
Create Your Base
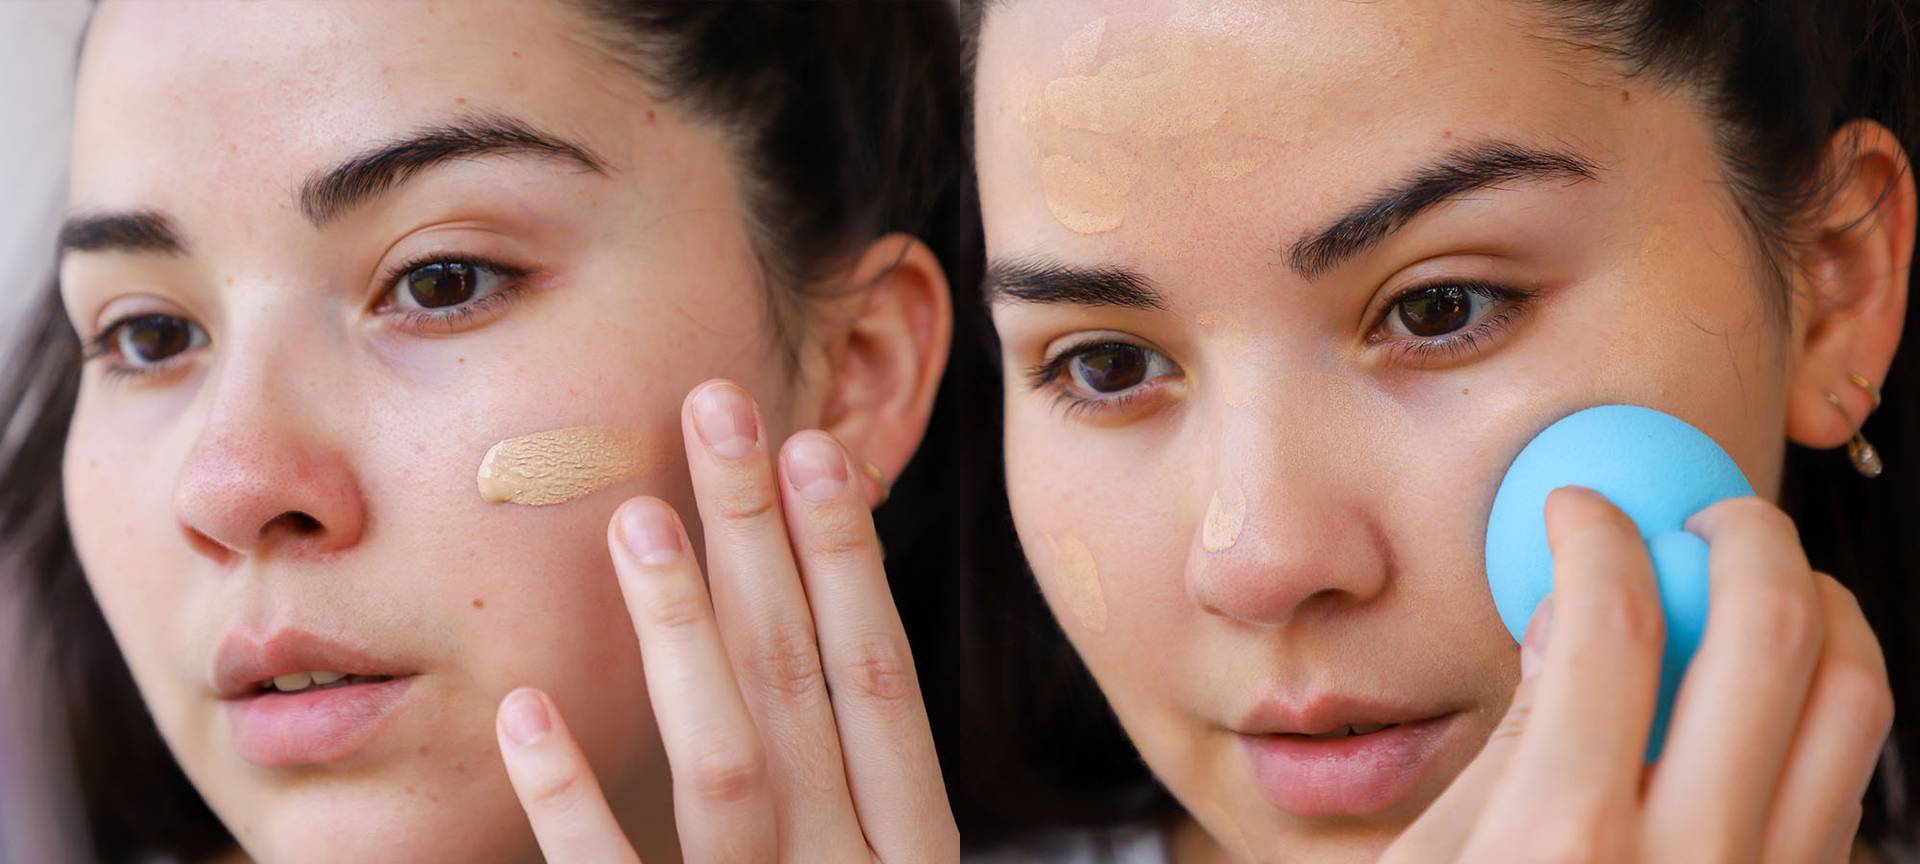
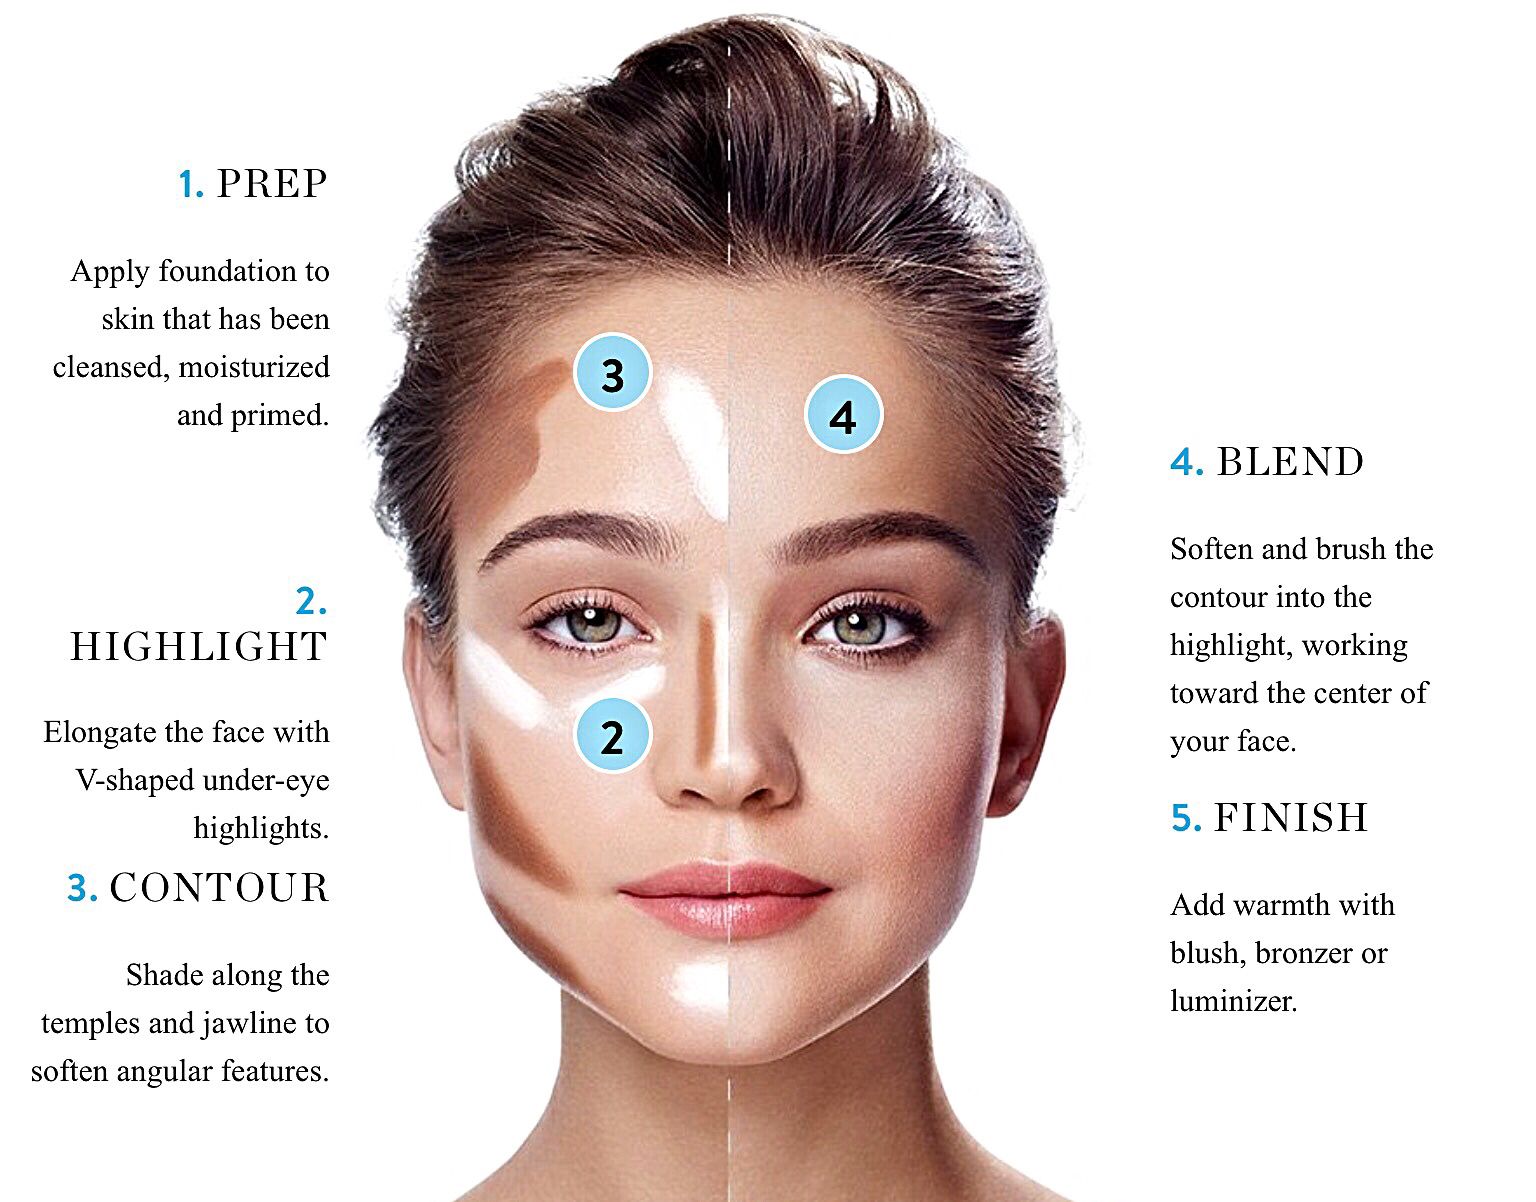
Before applying your contour, start with a smooth foundation and concealer. A good base will help everything go on easier and blend smoothly.
If you use contouring powder, apply a light layer of translucent powder to lock in the foundation and create a base.
Choose Your Product And Brushes
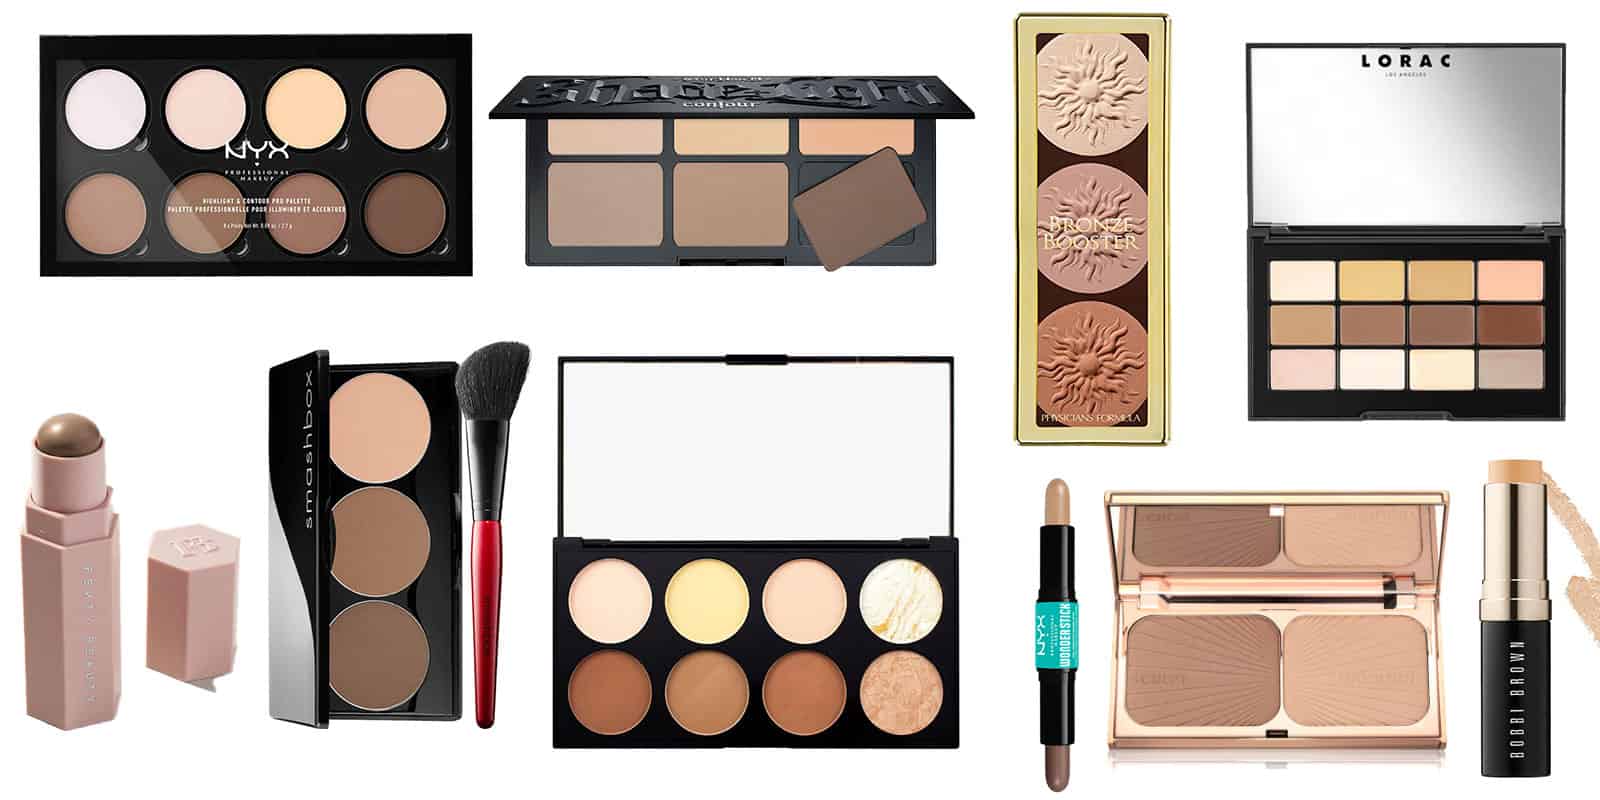
There are two main types of contour products: powders and creams. Cream products are easier to build and blend, making them a fabulous choice for beginners.
They have a dewy finish. Powders have a more matte finish, giving you that airbrush look.
Use smaller, fluffy brushes to apply your products. They will give you more control and more precision.
Have one brush for contouring and another for highlighting. Never use your contour brush to highlight and vice versa if you don’t want a muddy makeup look.
Map Out Your Face
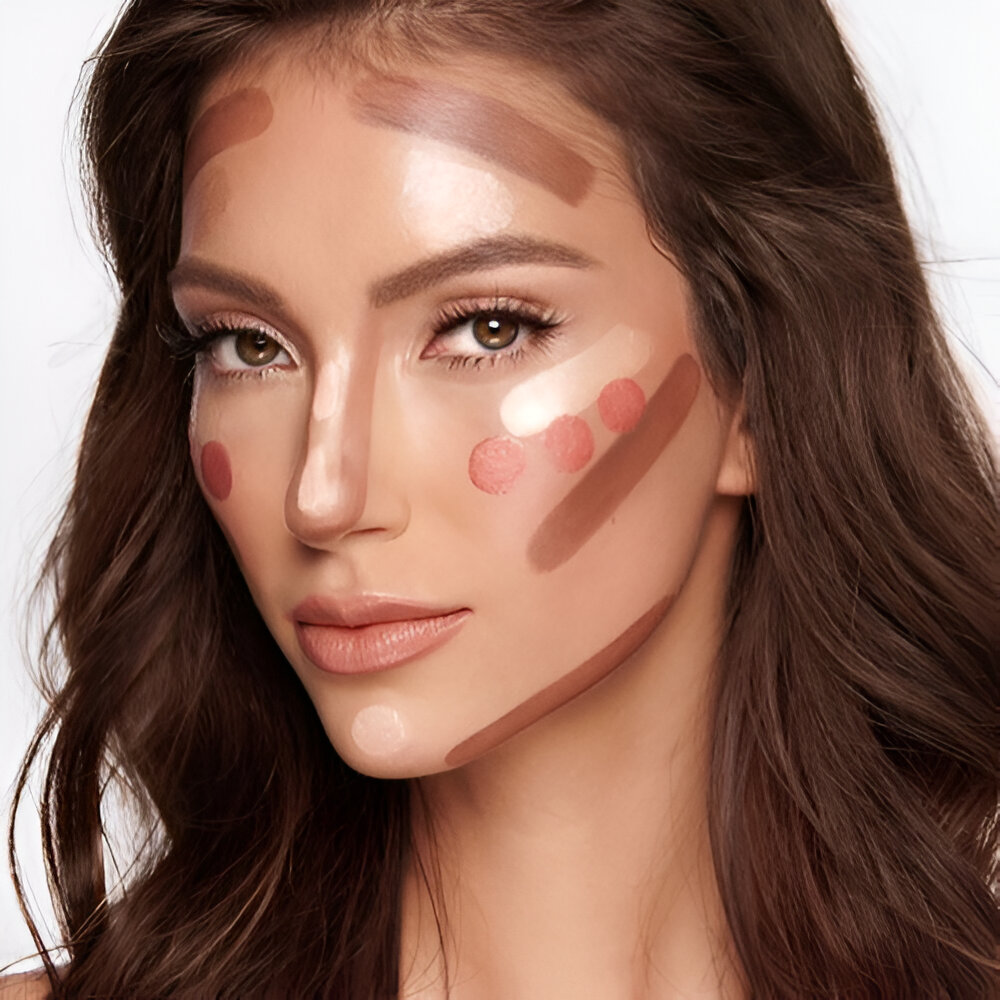
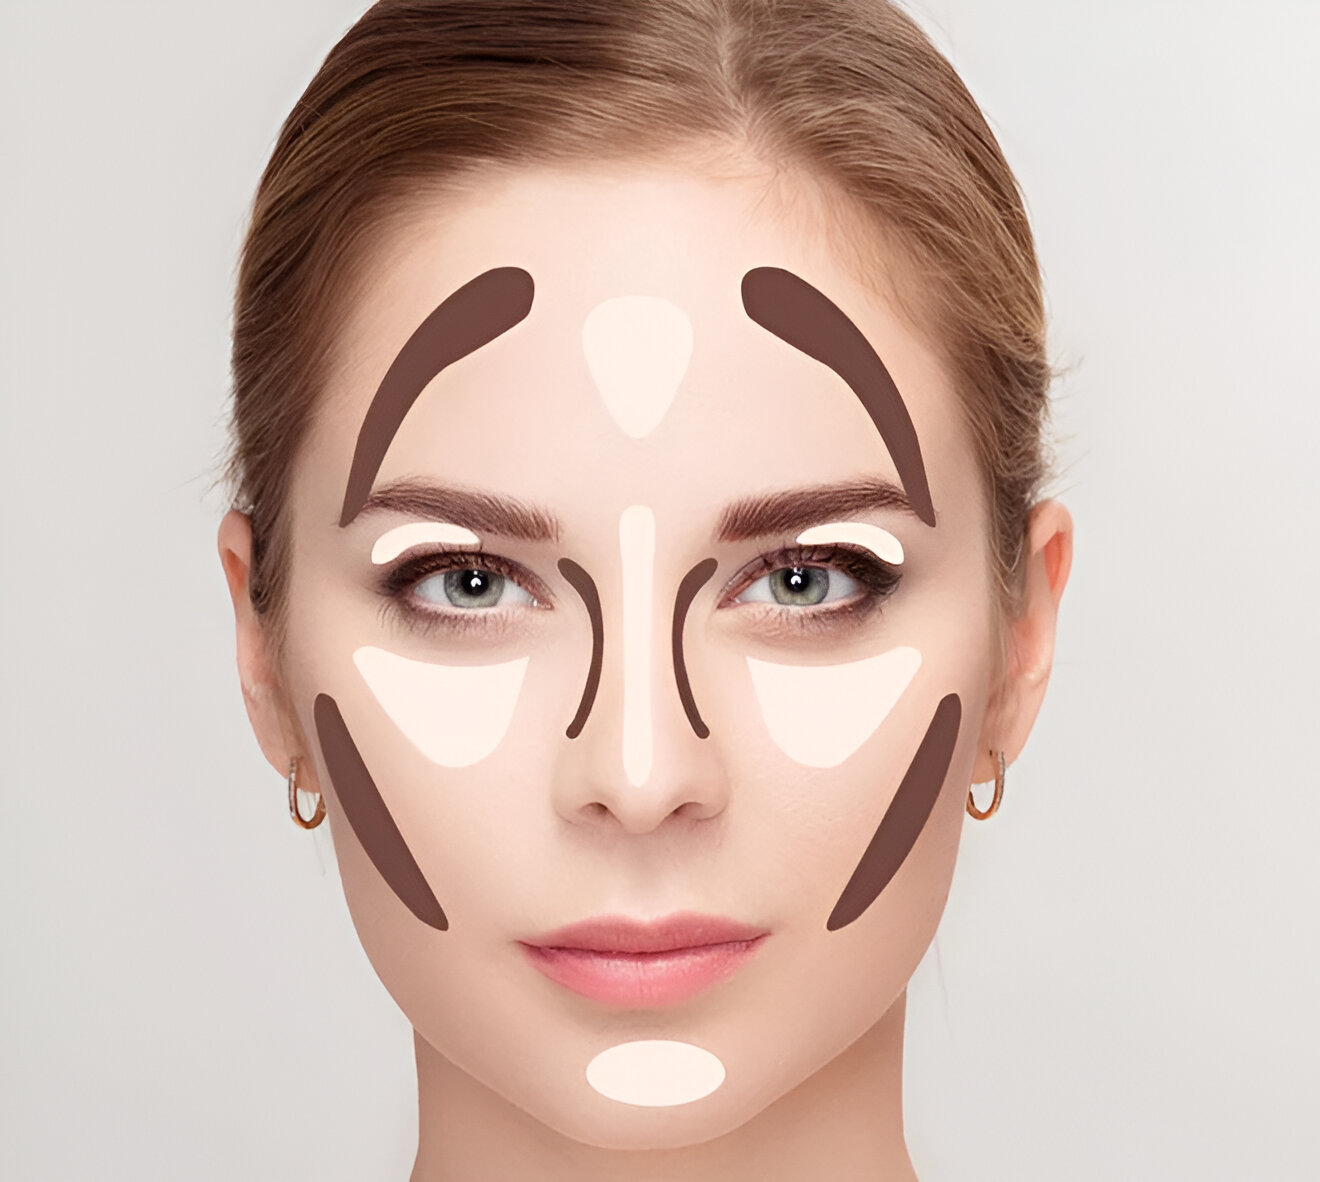
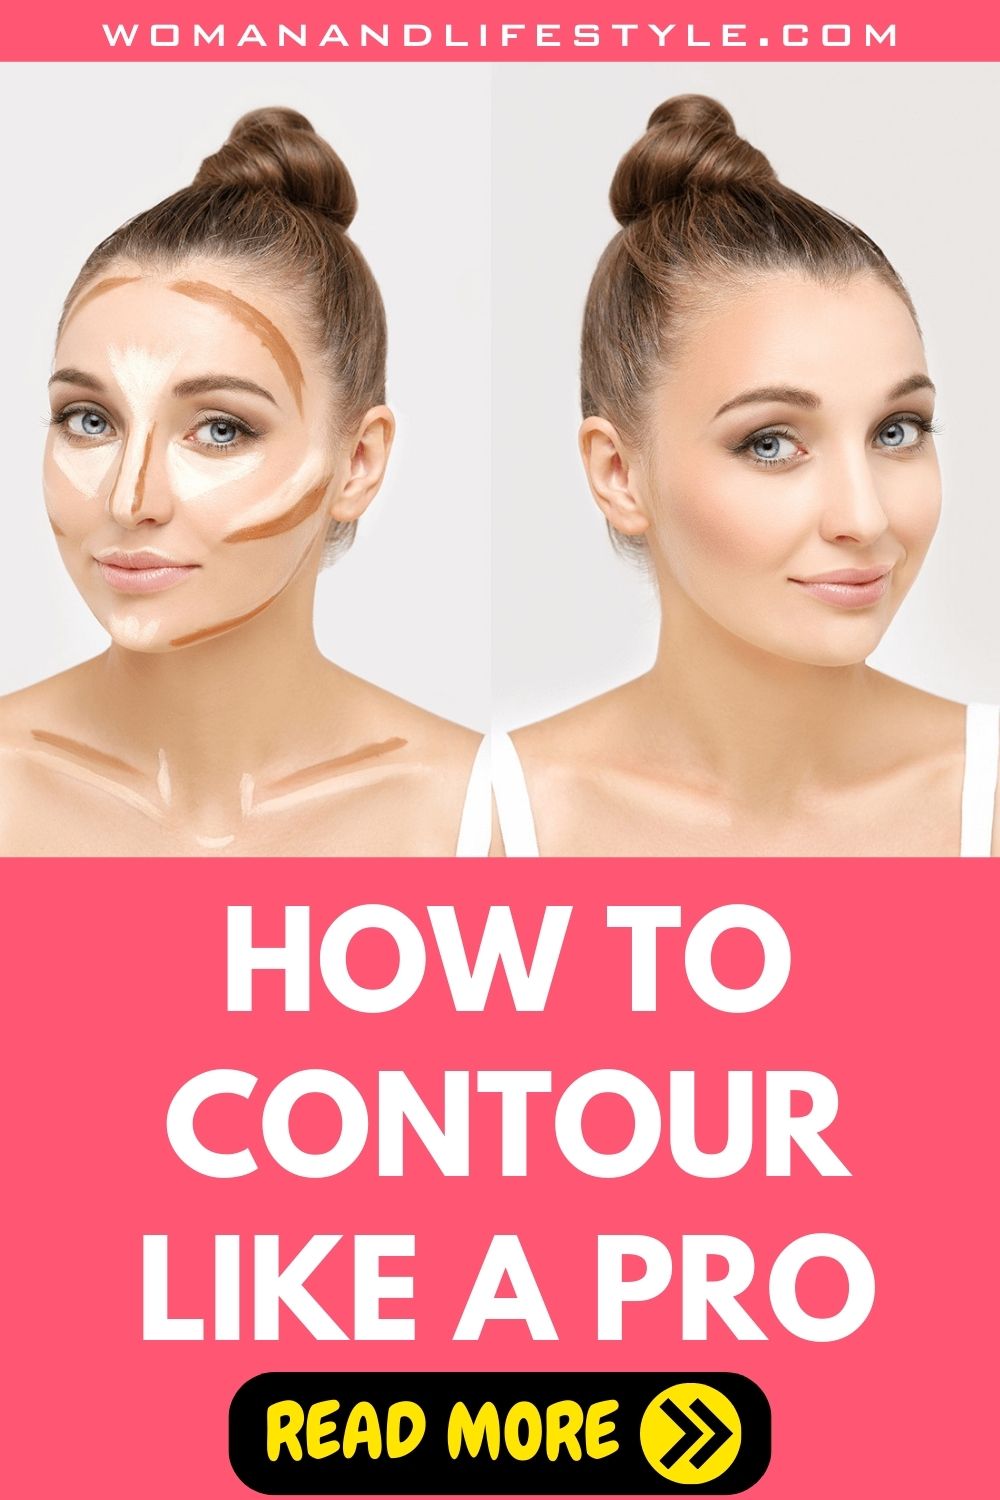
You’ll want to focus on under your jawline, your temples, the sides of your nose, and your cheekbones.
However, each face shape is different. Use your facial structure as your guide. Start light and slowly build up the pigment as you go.
You can always add more, but you can’t take it away.
Building And Blending
Nobody wants sharp, obvious contour lines on their faces. On the other hand, we don’t want an over-blended muddy finish look either.
Starting light and slowly adding more will be easier than trying to blend out the heavy lines.
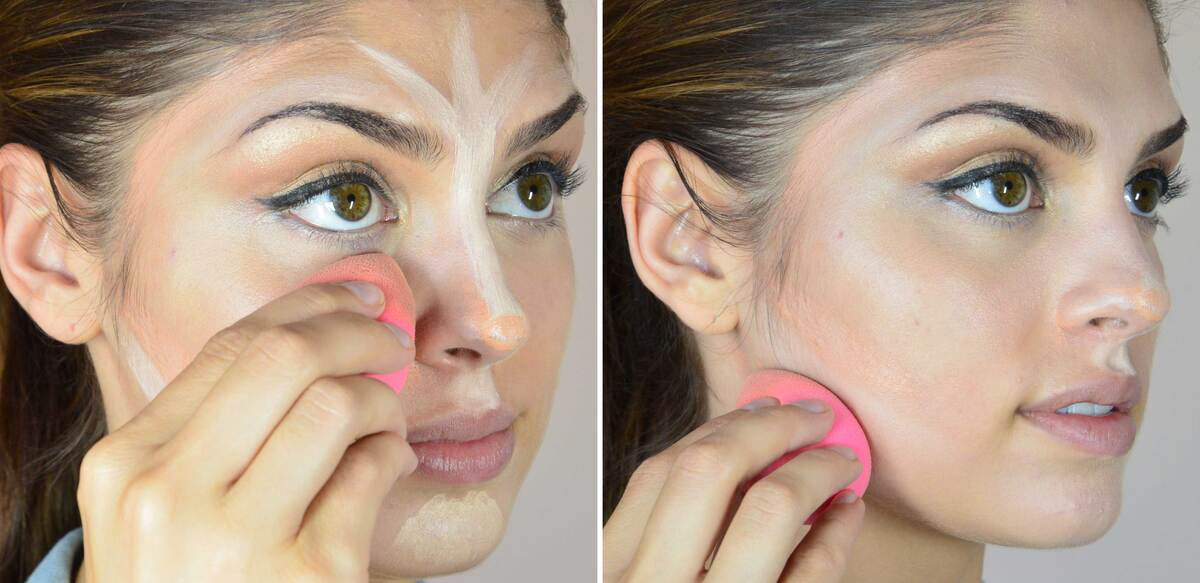
Use a damp beauty blender or a foundation brush to blend everything smoothly.
Highlight
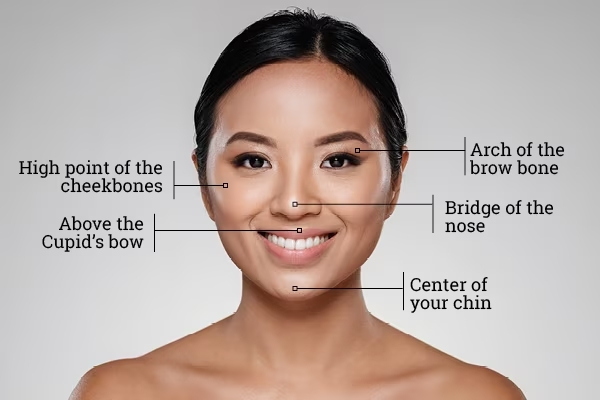
Highlight only where light naturally falls, such as your cheekbones, brow bones, nose bridge, top of your cupid’s bow, and center of your chin.
It will improve the contouring effect.
Contour For Different Face Shapes
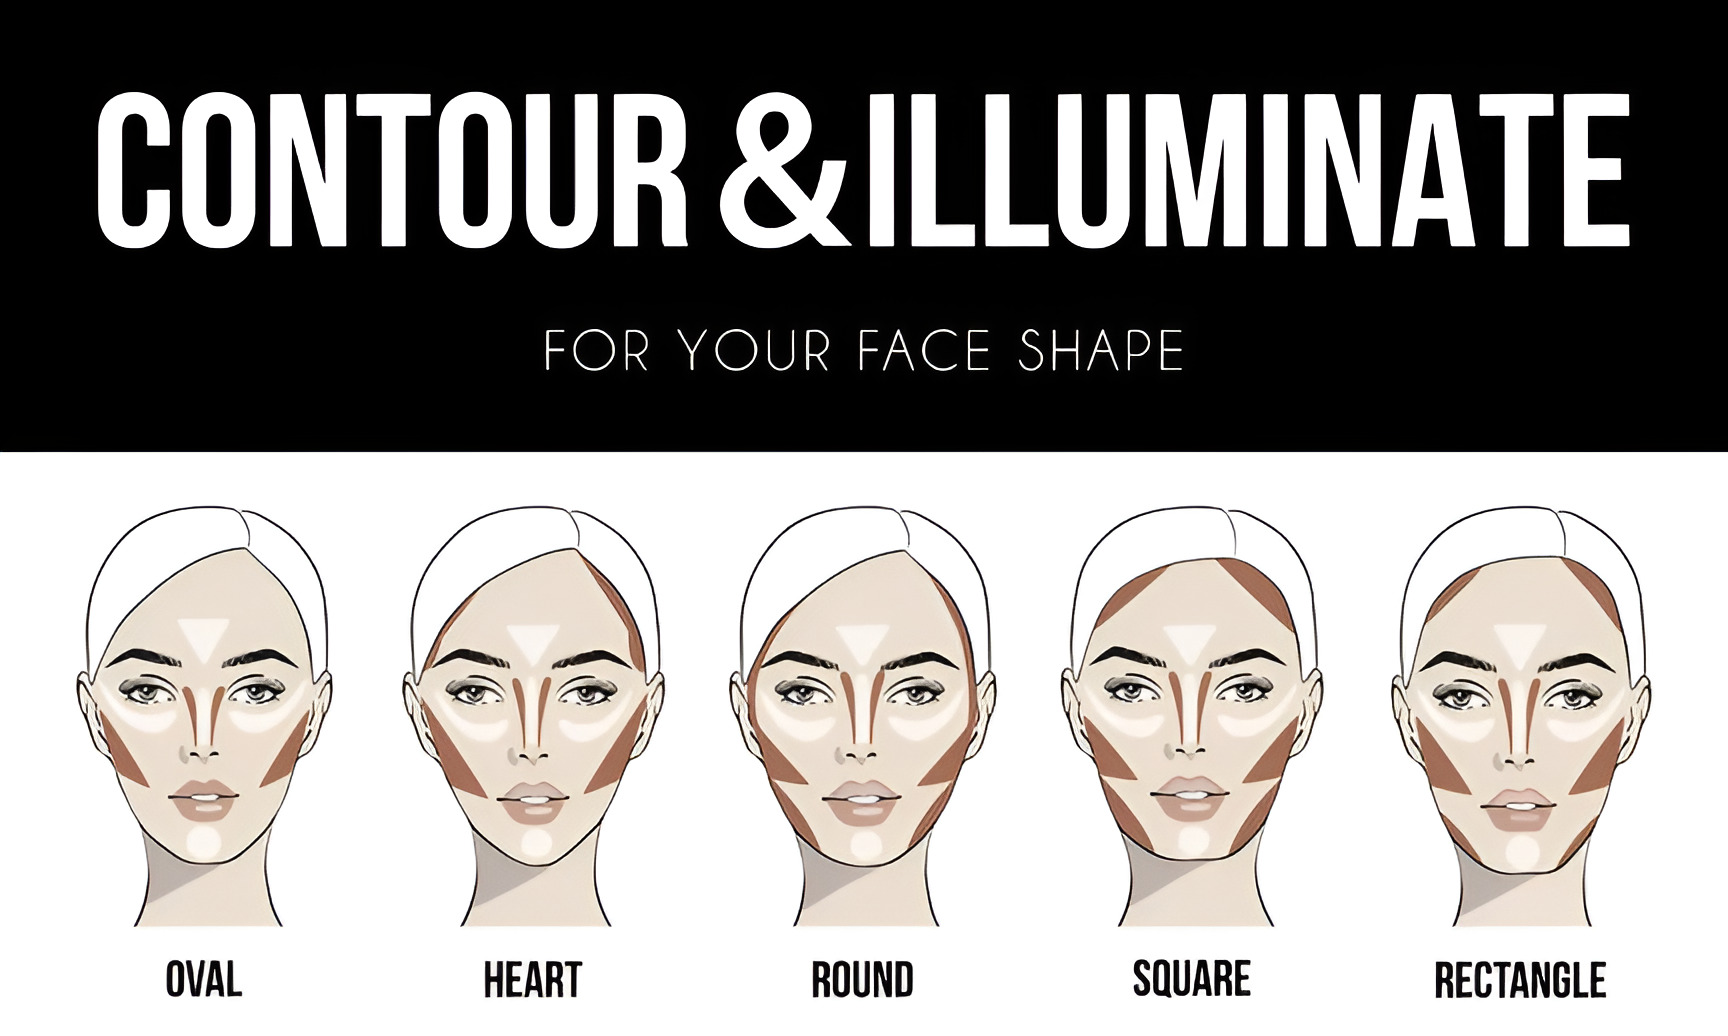
Contour For Heart-Shaped Face
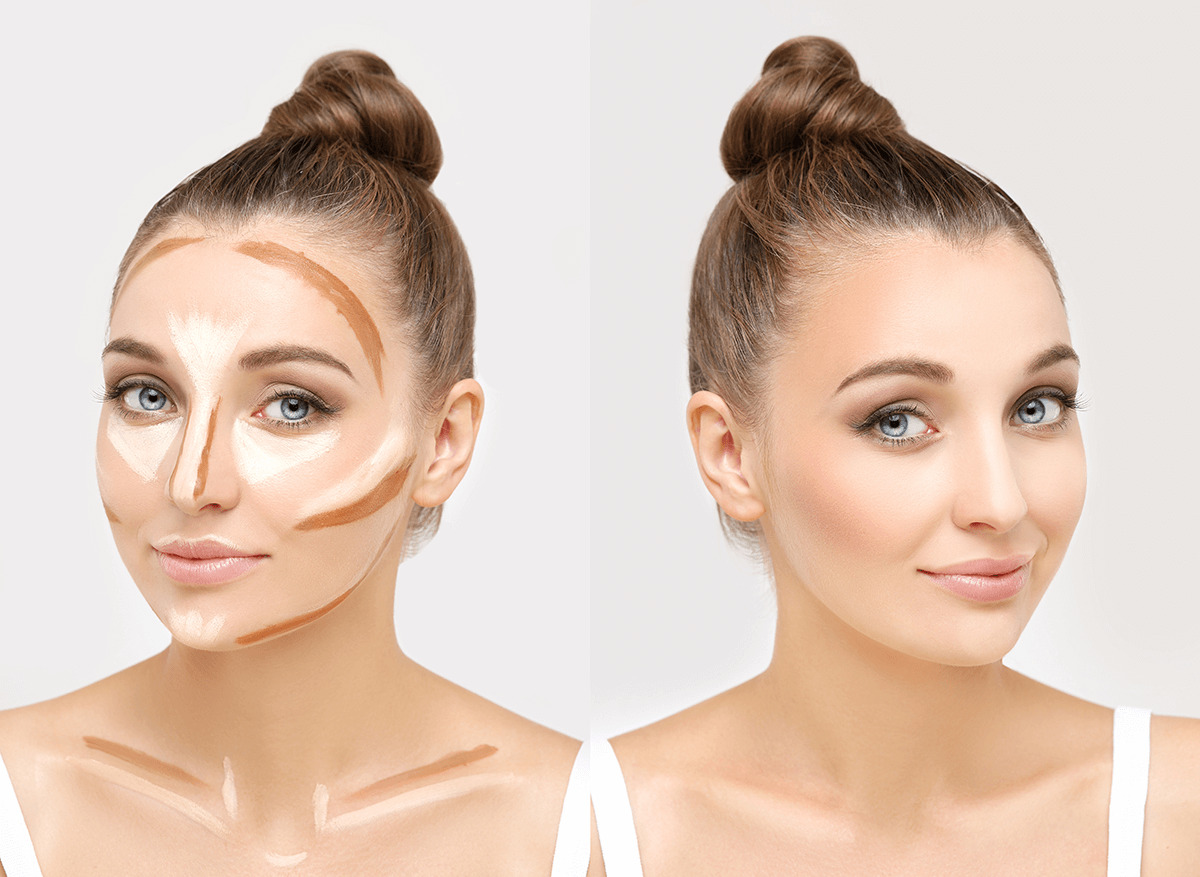
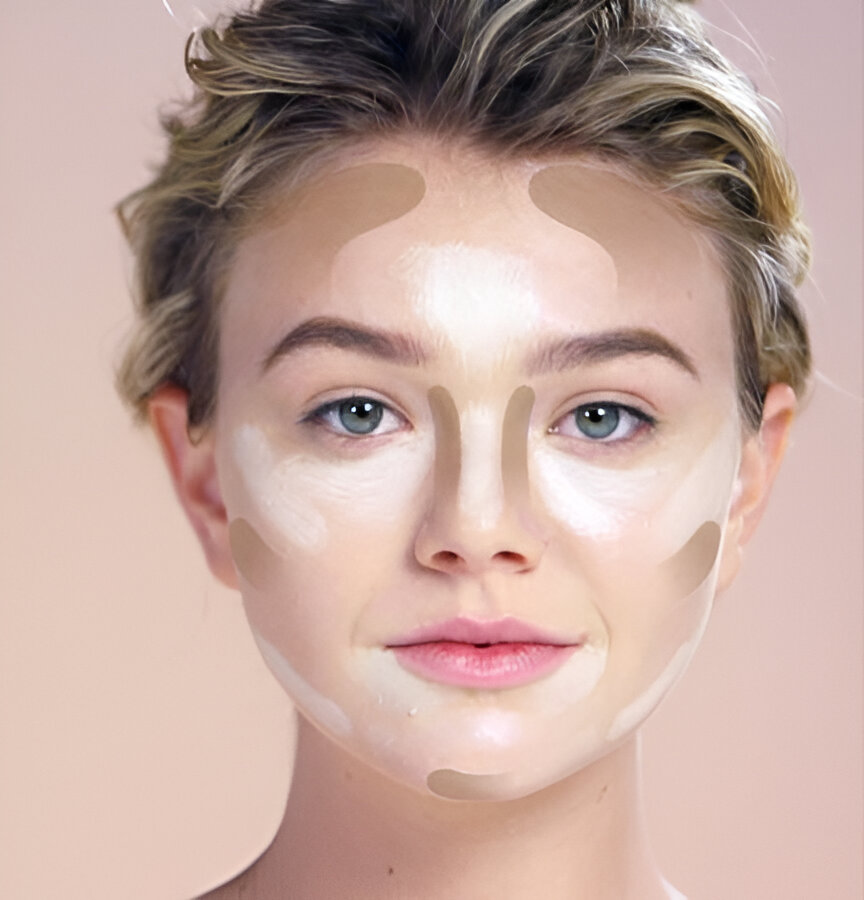
Highlight your jaw, nose bridge, the undereye area, the top of the cheeks, the corners of the mouth, and the center of the forehead with a cream highlighter or a concealer a shade lighter than your foundation.
The key to the perfect contour is to pick the right shade. If you have cold-undertone skin, avoid anything too warm or orangey.
On the other hand, girls with warm-undertone skin should avoid contouring colors that look ashen or gray.
Apply the product to the areas in the picture. Use a small, fluffy contouring brush for your nose and a big one for other parts.
Blend everything in an upward movement for a softer look. Little dabs instead of long strokes will ensure everything stays nice and sharp instead of muddy.
Contour For Round Face
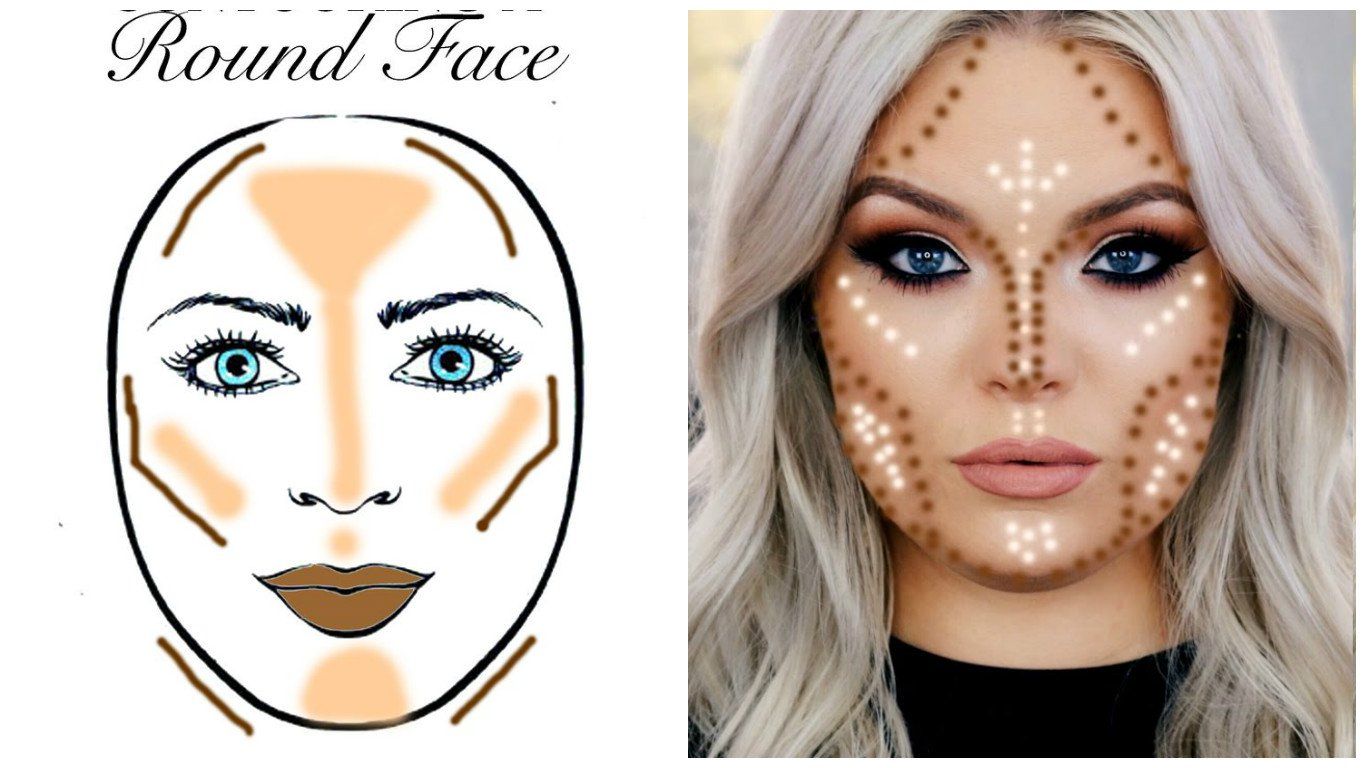
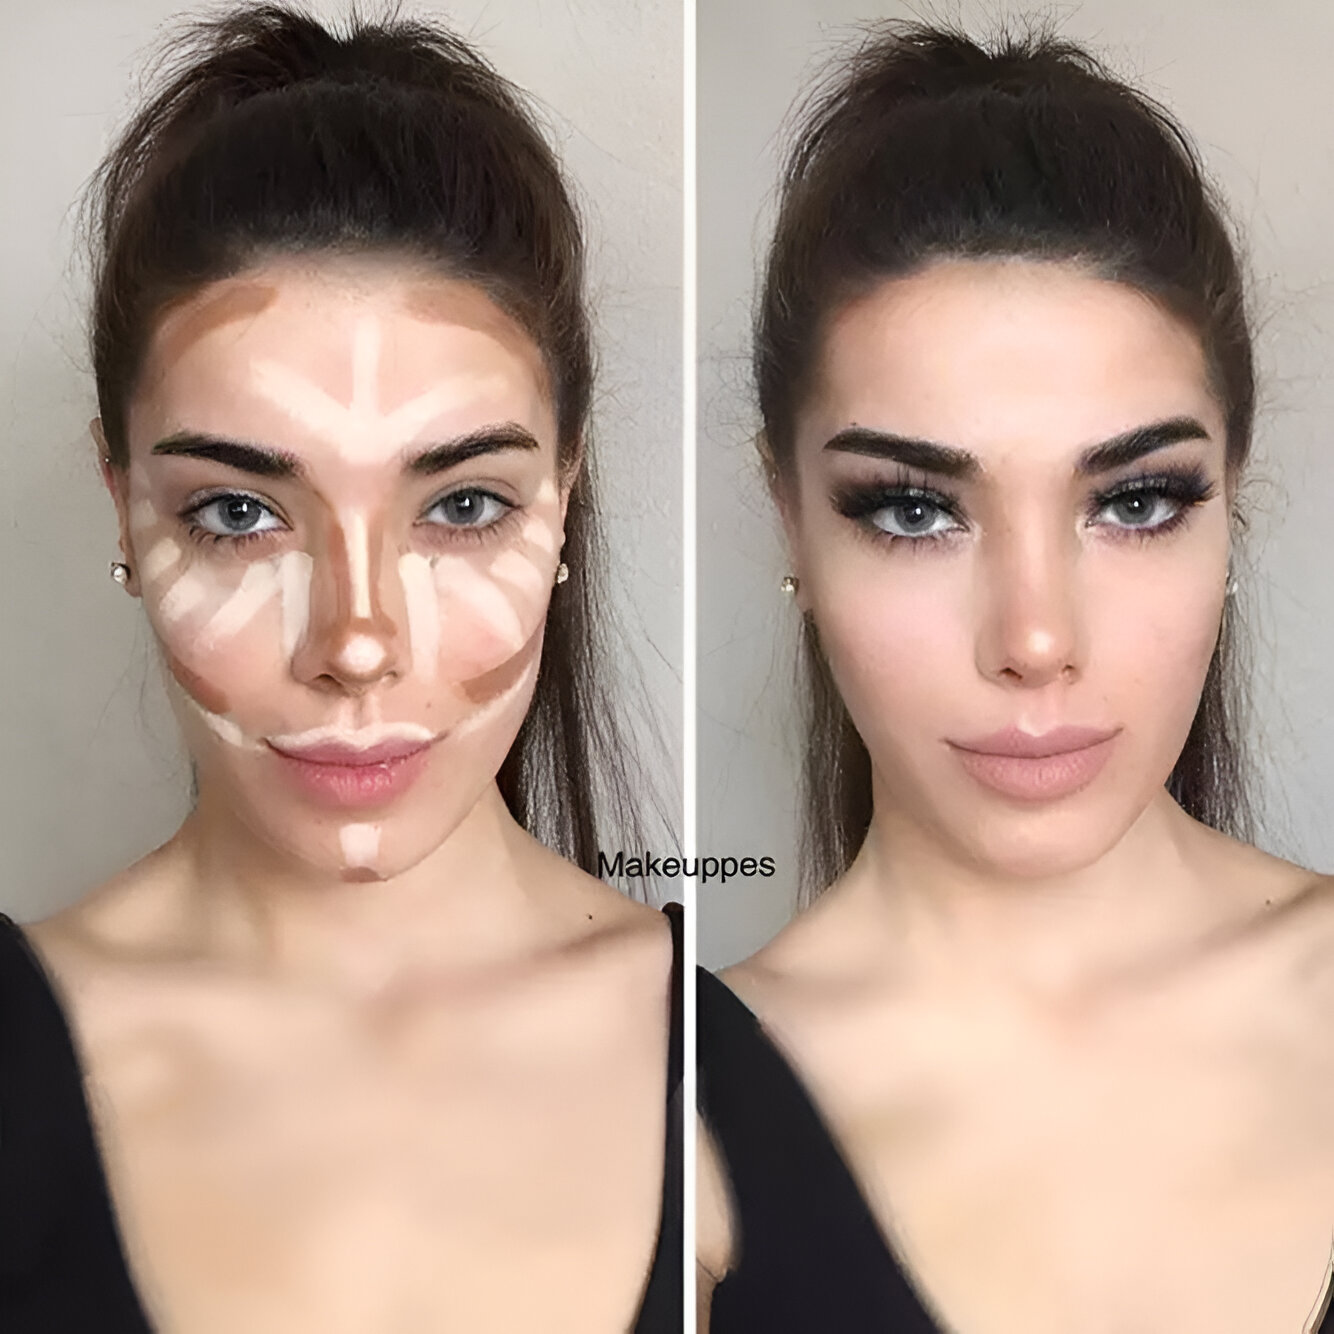
Before you start, prepare your skin by applying foundation. Highlight the center of your forehead, the bridge of your nose, and the center of your chin.
Draw long, inverted triangles under your eyes. Apply a highlighter to your cheekbones as well.
Start from the ear, and draw a line down your jaw to slim down your face. Draw two C-shapes to map out your temples.
Gover the sides of your nose to elongate it. Blend out the smaller areas with a small, fluffy brush. Use a big contouring brush to blend the rest until you see no harsh line left.
Contour For Square Face
Highlight the center of your forehead, the center of your chin, and the nose bridge.
Create two little V-shapes under your eyes, and repeat with the outer corners of your mouth.
Focus on applying the product on the jawline, underneath the cheekbones, and the sides of the nose. Follow the map we show in the picture.
Start blending the highlighted areas first, then use a big brush to blend the contour into the highlight. Small dabbing motions may work better for beginners.
Contour For Oval And Oblong Face
With a cream highlighter, draw an arch under your eyebrows, then a triangle on the center of your forehead.
Highlight your nose bridge, under-eye areas, and the center of your chin.
Draw a diagonal line from your cheekbone to near the corner of your mouth, as shown in the picture.
Contour the outside of your forehead and the sides of your nose. Blend everything with a fluffy brush.
Contour For Diamond-Shaped Face
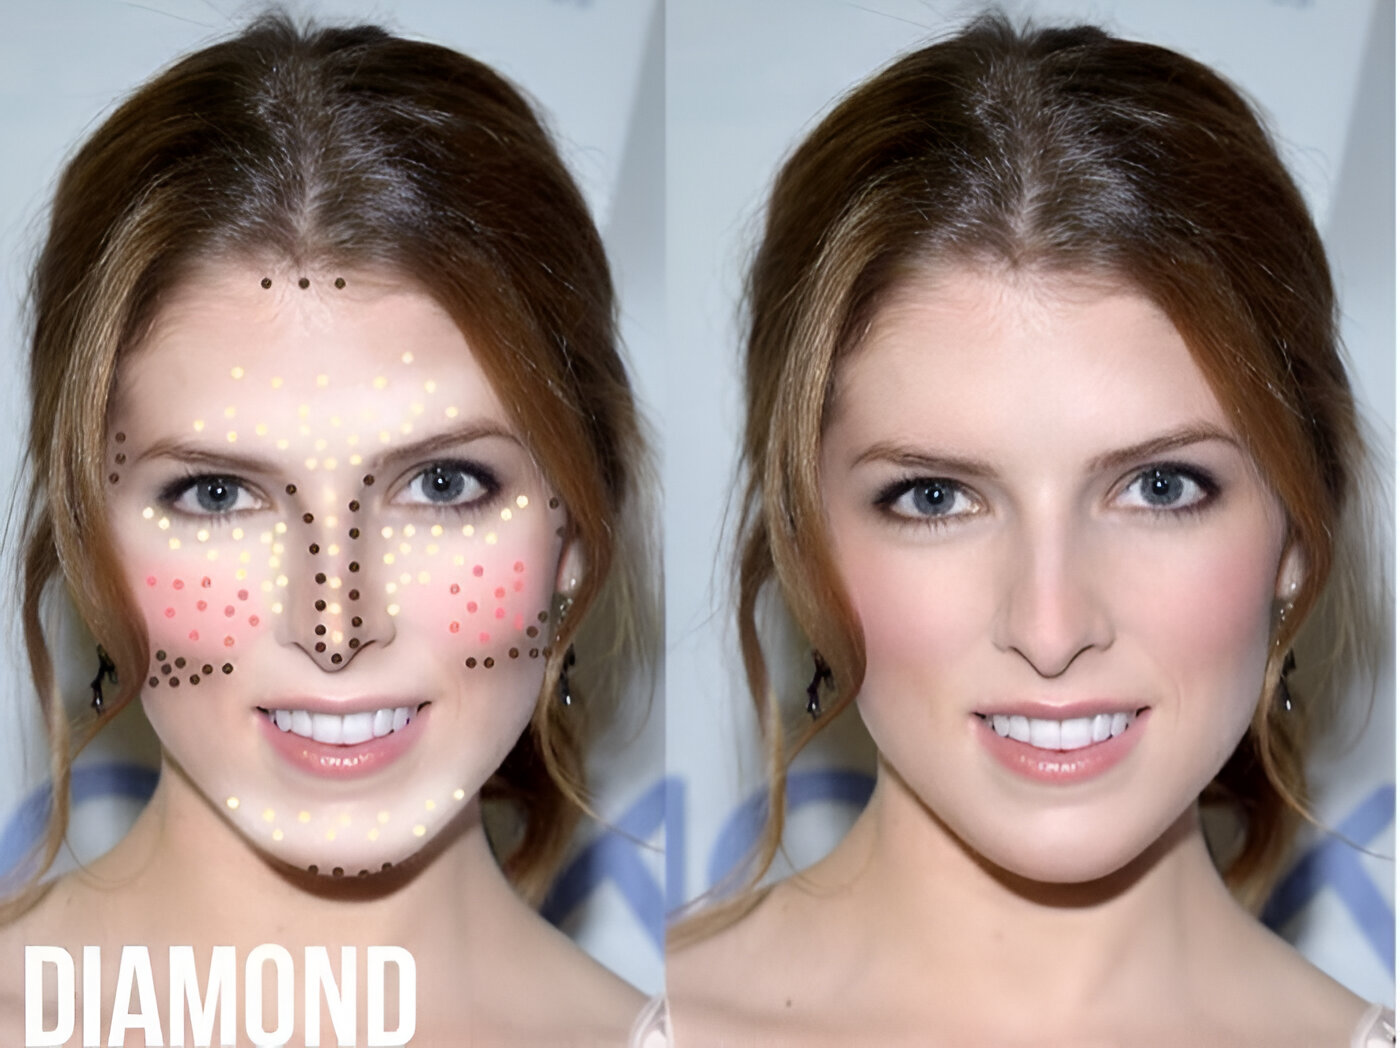
If you have a diamond face shape, you will want to bring out your undereye area, the middle of your forehead, and the center of your chin.
Apply a cream highlighter or a light-shaded concealer to these areas to balance your facial features.
Contour the area below your cheekbones, starting from your ears and continuing in the center of your cheeks. Following the map we show in the picture.
Contour For Rectangle Face
Apply a highlighter on your undereye area, along your brow bone, and the middle of your chin.
For contouring, concentrate on shaping the sides of your brow to make your hairline appear narrower.
Also, run along your hairline, under your jawline, and below your cheekbones, beginning at your ears and ending in the center of your cheeks.
Tips For The Perfect Contour
- Understand your face shape. Following your facial structure is the best way to ensure a natural contour look.
- Avoid contouring products that are too orangey or shimmery.
- You can use the handle of a makeup brush as a guide to keep your nose contour straight.
- Invest in good brushes and tools. Bad ones will take away the product’s pigments, creating a mess and a muddy look that nobody wants.
Do you like our guide on how to contour like a pro? Contouring can be pretty intimidating, especially if you’re a beginner.
But don’t worry! Practice will make everything better! You will quickly get the hang of it the more you practice.
So don’t forget to save this guide to your Pinterest by hitting the Pin button and adding this post to your collection.
Before you leave, we still have a lot of fabulous beauty inspirations waiting for you on our site.
From stunning manicure ideas to the hottest outfit trends, we have everything you need to become a fashionista.
Explore and unlock the key to a fashionable lifestyle now!


